

Wheelchair Tips for Corgis, Dachshunds & Long-Back Dogs Safely
Setting up a wheelchair for a corgi or dachshund comes down to getting height, axle position, and traction right on day one. This guide shows the fit checks that prevent rubbing, tipping, and the common “won’t move” reaction. Examples use our dog rear leg wheelchair, then we cover day-one sessions and ramp troubleshooting.
Rule Out Pain And Sudden Change First
Wheelchair fit problems look a lot like discomfort, so do not “adjust through” new pain or a sudden mobility change. Long-backed breeds are also overrepresented in intervertebral disc disease (IVDD), and owners often first notice reluctance to move, back pain, or new weakness (see signs of IVDD in dogs), which needs veterinary guidance before you push activity.
If your vet has already cleared assisted walking, a rear-wheel cart can be a good way to restore safe movement. If you are unsure whether now is the right time, review when a wheelchair is appropriate for IVDD and confirm the plan with your veterinarian.
- Call your vet promptly for new pain signs like yelping, trembling, or a tight tucked belly.
- Call your vet promptly if weakness worsens suddenly or your dog stops supporting weight unexpectedly.
- Call your vet promptly for any new bladder or bowel changes.
- Pause the cart if your dog refuses to move and cannot be coaxed with calm, gentle handling.
- Pause the cart if you see fresh scuffing, bleeding, or obvious skin breakdown under straps.
Dial In Fit For Long-Back, Low Dogs
In corgis and dachshunds, a small height change can swing posture quickly: too high in the rear makes the chest dive and overloads shoulders, and too low makes the frame snag thresholds and can pull straps out of place. Aim for a neutral, level back and a smooth roll where your dog steps forward instead of “towing” the wheels.
Height check: from the side, the spine should look level while your dog is standing and taking a few steps. If the front end looks like it is working much harder than normal, lower the rear height a small amount and recheck; if the frame scrapes or catches on normal flooring transitions, raise the frame slightly and then recheck that the back stayed level.
Axle check: if your dog’s steps get short and choppy and they keep glancing back at the wheels, the axle is often too far back or the cart is effectively “behind” them. If the cart feels unstable on turns or wants to pop up when you slow down, the axle can be too far forward; make one adjustment at a time, then retest on flat, grippy flooring.
Strap check: “snug, not tight” means the harness holds position without pinching, and you can slide two fingers flat under the strap. If a belly strap keeps drifting toward the groin, it is usually migrating because it is too loose, off-center, or the frame height is pulling it downward, so recenter it and recheck after a short walk.
Day-One Sessions That Build Confidence
Start on the easiest surface you have: flat, quiet, and high-traction so the wheels roll and the front feet do not skid. Clip a leash as usual, encourage straight lines first, and save tight turns, doorways, and outdoor bumps until your dog is rolling forward smoothly.
If your dog freezes, avoid dragging the cart forward. Instead, reset the cart on a better surface, lure one or two steps, praise, and stop before frustration builds; many “refusal” cases begin with a first session that was too long or on a slick floor.
For long-backed dogs, treat the first week as skill-building, not exercise. Keep sessions short, end on a smooth forward walk, and build time only when the next session starts confidently.
Safety matters more than distance: confirm alignment and comfort (no rubbing, pinching, or wobble), supervise every session, and ramp up gradually with short outings in the first week. Stop and reassess if you see redness, distress, tipping, refusal to move, sudden mobility change, or rising pain. Plan routes around your home layout, indoor traction, outdoor terrain, and what you can safely handle as the caregiver.
Ramps, Thresholds, And Slick Floors Troubleshooting
Ramps help when stairs and jumping are restricted, but ramps also magnify fit problems because they change body angle and traction demands. Before you add a ramp, confirm your dog can roll straight on flat ground without rubbing or tipping, then introduce ramps slowly and only with good traction.
| If You Notice This | Likely Cause | Try This Today |
|---|---|---|
| Tipping on turns | Turns are too sharp or speed is too high | Slow down, practice wide turns, and keep the leash guiding straight first. |
| Frame catches thresholds | Rear height is set too low for your home | Raise height slightly, then recheck for a level back on flat traction. |
| Rub marks at groin or belly | Straps are migrating, twisted, or overtightened | Stop, recenter straps, remove twists, and restart with a shorter session. |
| Refusal after a bad start | First experience felt scary, slippery, or hard to control | Reset on a quiet, grippy floor and ask for just a few easy forward steps. |
| Front-end fatigue very quickly | Rear is too high or the axle sits too far back | Lower rear height a bit or bring the axle forward, then shorten the route. |
Final Thoughts
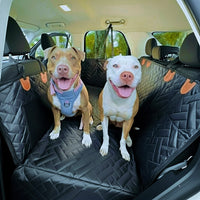
For corgis and dachshunds, the winning setup is usually the simplest one: level back, smooth roll, and zero rubbing. If you want a rear-support option to start dialing in fit, see the Whisker Bark dog wheelchair. For car rides to rehab visits or outdoor adventures, a Whisker Bark waterproof dog seat cover helps protect seats from damp paws and accidents. If something changes suddenly or your dog seems painful, pause the cart and get your vet involved before you push more activity.
Share