How To Choose A Dog Wheelchair: Support, Size, Terrain, Fit
If you are comparing pet wheelchairs for the first time, it is normal to feel overwhelmed. The best choice is not “the best brand.” It is the chair that fits your dog’s body, rolls straight without rubbing, and matches your home layout and terrain.
This guide is consumer education, not veterinary advice. If your dog’s mobility pattern is unclear or changing quickly, work with your veterinarian or a canine rehabilitation professional before you increase use. Best Friends Animal Society also recommends working with a veterinarian to decide whether a wheelchair is appropriate.
Start Here: The Three Questions That Decide Everything
- Which limbs can reliably propel your dog? This points to rear support versus full support.
- Can you get a stable fit without rubbing? Fit problems are the most common reason a wheelchair ends up unused.
- Where will you use it most? Indoor traction, doorways, and outdoor terrain change what “works” day to day.
The Real Pain Points Owners Run Into
Most people do not struggle with the concept of a wheelchair. They struggle with the details that make daily use practical.
- Unclear sizing inputs: Some charts rely on weight alone, which does not capture body proportions.
- Rubbing and pressure points: Even small misalignment can cause skin irritation, especially during the first two weeks.
- Drifting or tipping: A chair that pulls to one side or feels unstable is usually a fit or balance issue that needs adjustment.
- Home friction: Tight hallways, rugs, thresholds, and sharp turns can frustrate dogs during early sessions.
- Return policy surprises: Used equipment rules, restocking fees, and short return windows can make “try it and see” expensive.
Step 1: Choose The Support Type Based On What You See
Choose support type using observable movement, not guesses. When in doubt, ask your veterinarian or rehab professional to confirm what is safe for your dog’s condition and goals. Veterinary teaching hospitals and rehab services commonly help measure and fit mobility devices. For example, Virginia Tech’s Veterinary Teaching Hospital describes measuring pets for carts through their rehabilitation service.
Rear Support
Rear support is often a match when your dog can pull forward with the front legs, but the back end needs lift and alignment help. Owners often notice knuckling, dragging, wobbling behind, or quick fatigue even though the front end looks strong.
Full Support
Full support may be needed when front strength is also reduced, balance is unpredictable, or your dog cannot reliably propel forward with the front legs. These situations are more complex, so professional guidance is especially valuable.
Step 2: Measure Your Dog The Way Wheelchair Fitters Do
Manufacturers use different sizing inputs, but most rely on a small set of core measurements. If your dog has difficulty standing, one person can support while the other measures. Use a flexible tape measure, keep your dog in a natural position, and measure twice.
These measurement types are commonly used across wheelchair fitters and clinics:
- Height: back height to the ground
- Length: shoulder area to hip area
- Width: widest body width
- Girth: chest circumference
Measurement Walkthrough
| Measurement | How To Measure | Common Mistake To Avoid |
|---|---|---|
| Back Height To Ground | Measure from the top of the back (near the hips) straight down to the floor. | Measuring on an uneven surface or with your dog slouching. |
| Body Length | Measure from the mid-shoulder area to the mid-hip area along the body line. | Measuring to the tail base instead of the hip area. |
| Body Width | Measure straight across the widest part of the body. | Squeezing the tape tight or measuring on a curve. |
| Chest Girth | Wrap the tape around the widest part of the chest, behind the front legs. | Measuring too far forward (near the neck) or too loose. |
| Floor To Groin | For some rear-support fittings, measure from the floor up to the groin area while keeping your dog in a natural stance. This approach appears in rehab-style measuring instructions. | Lifting the rear too high or stretching the legs into an unnatural position. |
Printable Measurement Worksheet
Copy this into your notes app before you shop. Add photos of the tape placement for each measurement so you can double-check later.
| Field | Your Measurement | Photo Taken |
|---|---|---|
| Weight | _____ | Yes / No |
| Back Height To Ground | _____ | Yes / No |
| Body Length | _____ | Yes / No |
| Body Width | _____ | Yes / No |
| Chest Girth | _____ | Yes / No |
| Floor To Groin | _____ | Yes / No |
Step 3: Fit Checks That Prevent Most Problems
A good fit looks calm and stable, not forced. Use these checks every time during the first week.
- Alignment: the frame rolls straight and does not pull left or right.
- No twisting: the frame does not torque when your dog steps.
- No pinching: straps sit snugly without digging into ribs, groin, or inner thighs.
- Even support: the sling supports without creating a sharp pressure point.
- Harness comfort: straps should be snug but not restrictive. Some wheelchair training guidance uses a “two-finger” comfort check under straps.
First Week Ramp Plan
Most dogs need time to learn the feel, sounds, and turning mechanics of a wheelchair. Start small, stay upbeat, and stop before your dog gets frustrated.
- Day 1 to Day 2: 5 to 10 minutes, 2 to 3 sessions per day, flat surface only.
- Day 3 to Day 5: add gentle turns and slightly longer sessions if there is no rubbing and your dog stays confident.
- Day 6 to Day 7: add short outdoor pavement sessions, then grass later if the chair stays stable.
Manufacturer manuals and wheelchair safety guides commonly recommend short early sessions and gradual increases. For example, a Walkin’ Wheels manual advises starting with short periods and increasing slowly, with rest breaks and a maximum of about an hour at a time. A separate wheelchair safety guide also describes a limited daily session range with breaks and gradual build-up.
Terrain And Home Setup
Where you use the chair matters as much as what you buy.
- Indoor traction: slick floors can cause slipping. Start on rugs or a grippy mat if your dog struggles for traction.
- Doorways and turns: practice wide turns first, then tighter spaces. Rear wheels can clip corners while your dog learns steering.
- Thresholds and curbs: avoid them early. A small catch can spook a dog and make them refuse the chair.
- Grass and gravel: add later, with shorter sessions and closer supervision. Uneven ground increases the work your dog has to do.
- Caregiver reality: choose a setup you can lift, assemble, and adjust without stress. Consistency matters more than perfection.
Budget Checklist That Prevents Regret
Price differences usually show up in adjustability, wheel quality, and how easy it is to keep a good fit as your dog adapts. Before you buy, confirm:
- Adjustability points: can you tune height, length, and width enough to avoid rubbing?
- Wheel options: are the wheels appropriate for where you will use the chair most?
- Support and fitting help: is there a clear path for fit support if your dog pulls, tips, or rubs?
- Return rules: what counts as “used,” what is the return window, and are there fees?
Mistakes To Avoid
- Choosing by weight only: proportions and adjustability matter just as much.
- Starting too long or too fast: early overuse is a common path to rubbing and refusal.
- Ignoring small red spots: treat redness as a stop sign. Adjust and shorten sessions.
- Skipping daily checks: check contact points each session during the first two weeks.
- Using the chair unsupervised: dogs can catch wheels on furniture, tip on obstacles, or fatigue quickly.
Safety And When To Stop
Wheelchairs can support quality of life for many dogs, but they require supervision and fit discipline. Veterinary and animal welfare resources emphasize working with your veterinarian to decide if a wheelchair is appropriate and monitoring for complications. Best Friends offers a helpful overview of wheelchair types and the vet decision role. For dogs with limited mobility, veterinary guidance also highlights the risk of pressure sores and the importance of support tools and skin care. See VCA’s homecare guidance.
Stop and reassess if you see any of the following:
- Rubbing, redness, hair loss, or damp skin under straps
- Distress signals like freezing, repeated refusal to move, trembling, or panic
- Tipping, drifting hard to one side, or the frame twisting while rolling
- Sudden mobility changes or an apparent jump in pain or sensitivity
Final Thoughts
Choosing a dog wheelchair is mostly about fit and routine. Measure carefully, plan short supervised sessions in the first week, and use clear stop signals so your dog stays comfortable as they learn.
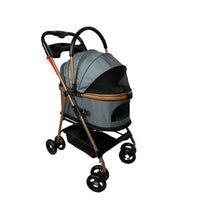
If you want a feature-focused option designed for adjustability and everyday practicality, a Whisker Bark dog wheelchair is built to support fit tuning as your dog adapts over time.
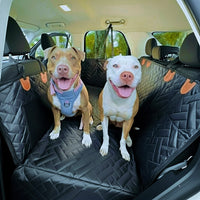
If your wheelchair routine includes car travel to rehab visits or trails, protecting your upholstery makes day-to-day life easier. Many owners pair mobility gear with a Whisker Bark dog seat cover with a hard bottom for a more stable surface and simpler cleanup after wet or muddy outings.
Share