

How to Get Dog Hair Out of Your Car
To get dog hair out of a car, drag a rubber tool across the surface in short strokes, changing direction as you go, until the hair balls up into piles you can lift. Then vacuum. Repeat until nothing new appears. A vacuum alone will not do it, because suction cannot pull hair that is wedged between fibers.
That is the whole method, and almost every guide gets it wrong by leading with the vacuum. The vacuum is the second step. The first step is mechanical: something has to physically break the grip before anything can lift the hair away.
Below is how professional detailers actually work through a car full of dog hair, why the hair is stuck in the first place, and which of the tricks circulating online are worth your time.
Why Dog Hair Welds Itself to Car Interiors
Three things are happening at once, and knowing which one you are fighting tells you which tool to pick up.
Static, and why rubber beats everything else
Materials sit on a scale called the triboelectric series, measuring which way they trade charge when rubbed together. The further apart two materials sit on it, the stronger the attraction between them.
| Material | Charge affinity |
|---|---|
| Hair | +45 |
| Nylon | +30 |
| Wool | 0 |
| Polyester | -40 |
| Polypropylene | -90 |
| Latex rubber | -105 |
Figures from the AlphaLab triboelectric series. Two things fall straight out of that table.
A rubber tool works because rubber sits roughly 150 points away from hair, the widest gap you can get with anything you can hold in your hand. A nylon brush fails because nylon sits fifteen points from hair, almost no gap at all, which is why scrubbing with one feels like pushing hair around rather than collecting it.
The table also explains why the same car can be easy one week and impossible the next. Polypropylene carpet sits 135 points from hair and grips it electrostatically. Nylon carpet sits close to hair and barely charges at all, so its hair problem is mechanical rather than static, and a different approach works better.
One caveat worth stating: the published figure is for human hair. No one has measured dog hair specifically. Keratin is keratin, so it is a fair extension, but it has not been tested.
The scales, not barbs
The common explanation is that dog hair has barbs like a fishhook. It does not. What it has is overlapping cuticle scales, arranged root to tip like roof shingles.
Forensic hair morphology describes the dog pattern precisely: imbricate scales with smooth margins, petal shaped, widely spaced, published in a comparative study of domestic animal hair histology. Because the scales all point the same direction, a hair slides into a weave root first with almost no resistance and then resists coming back out. It is a ratchet, not a hook.
That is why pulling straight up rarely works and raking sideways does. You are not fighting adhesion. You are fighting a one way mechanism, and you have to break the hair loose across the fibers rather than lift it out along them.
It also explains something every multi pet household already suspects. Cat hair is harder to get out than dog hair, and the morphology says why: cat scales are notched and closely spaced, so they present far more catch points per millimetre than the smooth, widely spaced scales on a dog hair. Dog hair fights you with stiffness, cat hair with grip. If you are clearing both, expect the fine stuff to need more passes.
Your carpet type decides the difficulty
Automotive carpet comes in two constructions. Cut pile, standard since the mid 1970s, has open fiber ends and releases hair reasonably well. Loop pile, common in older vehicles and still used in some cargo areas and trunk liners, is closed at the top, so hair that works into a loop has no path back out.
Look closely at your floor. If the fibers end in visible tips, it is cut pile and this job is winnable in an afternoon. If they arch over into little closed loops, expect it to take considerably longer and expect a stone rather than a glove to be the tool that finally works.
What Detailers Actually Use to Remove Dog Hair
Ranked by what working detailers reach for, not by what is marketed at you.
| Tool | Use it on | Never use it on | Verdict |
|---|---|---|---|
| Rubber pet hair rake | Carpet, cloth seats, cargo liners | Nothing, it is safe everywhere | The one tool to buy if you buy one. Around $15. Harder rubber rakes deeper into dense pile. |
| Detailing stone | Carpet, floor mats, trunk liners | Any plastic, leather, headliner, delicate cloth | The professional's answer for badly embedded hair. Buy the engineered kind, not drugstore pumice, which crumbles. |
| Damp latex glove | Seats, door panels, seams | Dense carpet, it tears | Nearly free and genuinely effective. Latex, not nitrile: nitrile grips but barely charges. |
| Vacuum with a brushroll | Everything except the headliner | The headliner, ever | The spinning brush is what lifts. Airflow matters more than raw suction here. |
| Shop vac | Collecting piles you already made | Expecting it to lift embedded hair | Strong but has no brushroll, so it removes nothing the rake did not already free. |
| Compressed air | Seat rails, seams, perforations, console gaps | Open carpet, it just relocates hair | Excellent for crevices, useless for surfaces. Always vacuum immediately after. |
| Horsehair brush | Dusting trim and leather | Embedded hair | Widely recommended, wrong job. Too soft to rake anything loose. |
Two notes on the stone, because it is the tool people are most nervous about and most wrong about. It is real professional practice, not internet advice: detailers publish it as their primary carpet method. And the constraint is pressure, not skill. As Greg Nichols of Reflections Detailing puts it in his write up of the technique, "You can't get aggressive with the stone on the carpet." Light passes, carpet and mats only, and keep it away from every plastic surface in the vehicle.
The Order Professionals Work In
The sequence matters more than any individual tool, because most of the frustration people report comes from doing the right things in the wrong order and undoing their own work.
- Empty the car and pull the floor mats out. Mats get treated separately and outside. Leaving them in means re-depositing hair on surfaces you already cleared.
- Quick vacuum pass. Not the real one. This clears loose surface hair and grit so you are not grinding debris in during the next steps.
- Compressed air into the crevices, working top down. Seat rails, the gap where the seat back meets the cushion, console edges, belt towers, trim seams.
- Vacuum again immediately. The air did not remove that hair, it moved it. This step is the one people skip, and skipping it is why the job feels like it is going backwards.
- Mechanical lift. Rake, stone, or gloved hand, in small sections. This is the actual work.
- Vacuum the piles, then go back to step five. Repeat until a pass produces nothing new.
- Shampoo or extract, only now. Wetting hair before you have lifted it mats it together and drives it deeper.
- Leather and vinyl, then the headliner last, with the gentlest possible touch.
The structural thing to understand is that steps five and six are a loop, not a sequence. Hair is never picked up in one motion. It gets consolidated into piles, then collected, and then the next pass brings up more. A badly furred car can take ten cycles.
Getting Dog Hair Out of Car Carpet
Carpet is the hardest surface in the vehicle and the one most people give up on. Four technique details separate a pass that works from a pass that just rearranges the problem.
Work dry. Every professional process lifts hair before any liquid touches the carpet. Damp hair mats and buries.
Change direction constantly. This is the single most useful instruction in this article and almost nobody publishes it. As one detailer put it on the AutoGeek forum, "the key is to change directions when you are brushing. Not all the hair goes into the fabric at the same direction." Go front to back, then side to side, then diagonally. Hair that will not move under one direction lifts easily under another.
Sweep toward yourself, not back and forth. Scrubbing redistributes. Unidirectional pulls consolidate hair into a ridge you can pick up.
Small sections. A square foot at a time. Trying to cover a whole footwell in long strokes produces a thin scatter of loosened hair instead of a pile.
Floor mats get the abusive treatment because they can take it. Out of the car, slammed against the ground repeatedly, then hosed on the hardest setting and dried flat. Fixed carpet gets none of that: controlled moisture only, and extraction rather than flooding. The same split applies to a seat cover, which comes out and gets treated like a mat rather than like upholstery, and our guide to cleaning a dog seat cover covers what survives a machine and what does not.
Hagerty's carpet deep clean walkthrough is a good companion if you are going all the way to a shampoo.
Getting Dog Hair Out of Cloth Car Seats
Same tools, less force. A damp latex glove is the safer default here, and the trick is the angle: start with your palm flat against the fabric and progressively raise it toward vertical as you pull, so the glove rakes rather than skids.
The stone works on cloth seats too, but with noticeably lighter pressure than carpet, and not on delicate or knit-face fabrics.
Work top down, so hair you shake loose lands on surfaces you have not done yet. The heaviest deposits are almost always in three places: the seat bolsters, the seam where the back meets the cushion, and the rails underneath.
Leather, Vinyl, and Perforated Seats
Hair does not embed in leather. It collects in the stitching, the seams, and the perforations, which means the tools change completely. No rake, no stone, nothing abrasive.
The sequence is compressed air into the seams first, then a soft brush, then vacuum, then clean and condition. Hold the air a few inches back so the blast does not mark the surface.
The rule that matters on perforated leather is debris out before liquid in. If you spray a cleaner onto a perforated seat that still has hair and grit sitting in the holes, you push all of it down inside where nothing will retrieve it. Get it dry and clean first, then treat the surface.
The Headliner, and the One Thing You Must Not Do
Never put a vacuum on your headliner.
A headliner is not upholstery. It is a layer of very short fibers bonded to a foam board with a thin layer of glue, and the whole assembly is held up by that bond. Vacuum suction pulls the fabric away from the adhesive. So does aggressive scrubbing, and so does soaking it, because moisture travels through the fabric into the foam and attacks the glue from behind.
The consequence is not cosmetic. Per Capital One's headliner guide, which cites AMMO NYC founder Larry Kosilla, "Once a headliner starts sagging, there's really no remedy other than taking the whole thing down and re-gluing it, a chore that involves major disassembly of your car's interior trim."
For hair, use a light rubber tool or a gloved fingertip with minimal pressure, in straight strokes only. No circles, which chew the short fibers. If you need any moisture at all, blot it on with a damp cloth rather than spraying, and dry each section with a towel as you go. For tight edges around dome lights and grab handles, a short burst of compressed air lifts hair out of the crease without touching the fabric.
Before any tool touches any surface, try it on a hidden area first: under a seat, low on a door panel, the back corner of the cargo floor. Stones and stiff rakes can rough up a fabric face, and you want to find that out somewhere nobody looks.
How to Get Dog Hair Out of a Car Without a Vacuum
Entirely possible, with one honest limitation you should know before you start.
A rubber squeegee or rubber broom is the best no vacuum tool, for the same triboelectric reason as everything else in this article. Short firm strokes, one direction, pulling hair into piles. A damp rubber glove does the same job at smaller scale. A light mist of water first makes both noticeably more effective.
The limitation: none of these remove hair from the car. They lift it and gather it. You still have to physically collect the piles, and the fine hair and dander underneath stays behind.
Two things that make it workable. Take the mats outside so you can shake them out rather than trying to collect from them. And keep a strip of tape wrapped sticky side out around your hand for lifting the final piles, which is the one job tape is genuinely good at.
Static, Water, and the Fabric Softener Question
A light mist of plain water before you start does help, and the mechanism is real. Water raises the surface conductivity of the fabric so accumulated charge bleeds away instead of holding hair against fiber. Damp, not wet.
Humidity is why this job feels wildly different from one day to the next. Below about 30 percent relative humidity, static charge builds fast and holds; the comfortable range for static control is 40 to 60 percent. Industrial static-control guidance from Keyence puts the difference at roughly fifty times more charge generated in dry air than in humid air for the same action. In practice: a cold dry winter afternoon is the worst possible time to do this, and on a day like that misting is not optional, it is doing the job the air would otherwise do for you.
Diluted fabric softener is the contested one. Detailers who use it run somewhere between seven and ten parts water to one part softener, mist lightly, let it sit five to ten minutes, then rake and vacuum. It does break the static grip.
The honest caveat is that softener is a cationic surfactant and it stays in the fibers. Detailers who avoid it do so on the grounds that you are adding chemistry to carpet you will then have to remove, and the ones who use it recommend keeping the quantity minimal and following with a proper extraction rather than leaving it in. If you are not going to shampoo afterwards, plain water is the better choice. Rubbing a dryer sheet over the fabric is a lighter-touch version of the same idea, and touching a metal part of the car occasionally grounds you while you work.
What Does Not Work
- The balloon trick. Rubbing a balloon on the seat lifts hair that is already sitting loose on the surface, which is exactly the hair a vacuum gets in one pass. It does nothing for embedded hair, and embedded hair is the entire problem. No working detailer's process includes it.
- Lint rollers on embedded hair. A lint roller has adhesive tack and zero penetration into the pile. It cannot reach below the fiber tips, which is where the hair you are frustrated about is sitting. Fine for a finishing pass over a seat, useless as a method.
- Nylon brushes. Too soft to rake and, per the table above, sitting too close to hair on the charge scale to attract anything.
- Wire brushes. These circulate as a tip and they damage cars. Steel bristles shred cut pile and pull loops in loop pile, permanently.
- Duct tape. It works. It is just so slow that detailers who list it dismiss it in the same breath.
- Over-wetting. On carpet it mats hair and buries it deeper. On the headliner it destroys the adhesive bond and there is no undo.
How Long This Actually Takes
Worth setting expectations, because the two step version you have read elsewhere is not honest.
A car with light surface hair is twenty minutes. A car that has carried a shedding dog every day for a year, with hair worked into the carpet and packed into the seams, is a genuine afternoon. Detailers describe cycling brush, glove, and vacuum roughly ten times to clear one badly furred vehicle, in the region of four hours. Some detailers decline pet hair jobs entirely, which tells you something.
Professionally it usually prices as an add on to an interior detail, in the range of forty dollars for a sedan and scaling up sharply for a three row SUV or van.
Where the Hair Hides
Four places account for most of the hair people cannot find, and each has its own fix.
| Where | What you see | What gets it out |
|---|---|---|
| The bench gap | Hair disappears between the cushions and resurfaces weeks later | Compressed air down the gap, then vacuum immediately before it settles again |
| The door side seam | Hair packs along the outside seat edge where it meets the door | Damp gloved fingers along the crease, working outward |
| Seat tracks | Clumps collect under the rails and along the floor channels | Slide the seats fully forward and fully back, air first, then a crevice tool |
| The cargo lip | Hair piles at the rear edge and sticks to the carpet near the hatch | Stone or rake along the lip, sweeping toward the opening so the pile falls out |
Doing This Less Often
Everything above is removal. The reason to bother with prevention is that removal is genuinely unpleasant work and the alternative is not.
Two habits do most of the heavy lifting. A two minute brush before the dog gets in, focused on the chest, thighs and undercoat, takes a surprising amount of hair out of the equation. And wiping paws and legs before loading matters more than it sounds, because dirt is what gives hair something to grip; a clean coat sheds onto a surface, a dirty one works into it.
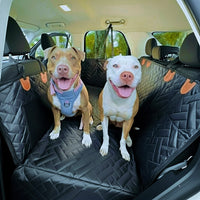
The structural fix is putting a barrier between the dog and the interior, so hair lands somewhere you can shake out rather than somewhere you have to rake. The difference is not in the amount of hair, it is in where the hair ends up. Hair on a removable surface is a two minute shake out, or a wash when it has earned one. Hair in a bench gap is next weekend.
What actually matters in a cover, for this specific problem, is coverage rather than comfort. Does it reach across the full bench and up the sides. Does it close off the footwell drop and the door side edges. Does it stay put rather than creeping and leaving gaps for hair to funnel through. A cover that shifts opens the exact traps you spent your afternoon clearing out, which is why ours is built around a rigid base with raised sides rather than more padding. The insert lifts out so the fabric itself goes in the machine, which for a heavy shedder is the difference between a cover you clean and a cover you tolerate.
The Short Version
Rubber tool first, vacuum second, and repeat the pair until a pass turns up nothing. Change direction constantly and work in small sections. Keep the stone on carpet and mats and away from every plastic surface. Never vacuum the headliner. Do it on a humid day if you can, and mist lightly if you cannot. Then brush the dog before the next ride, so you have to do less of this next time.
Share